Lemony Orecchiette with Chard & Parmesan, Pecan Crumble

BY Jen

Lemony Orecchiette with Chard & Parmesan, Pecan Crumble

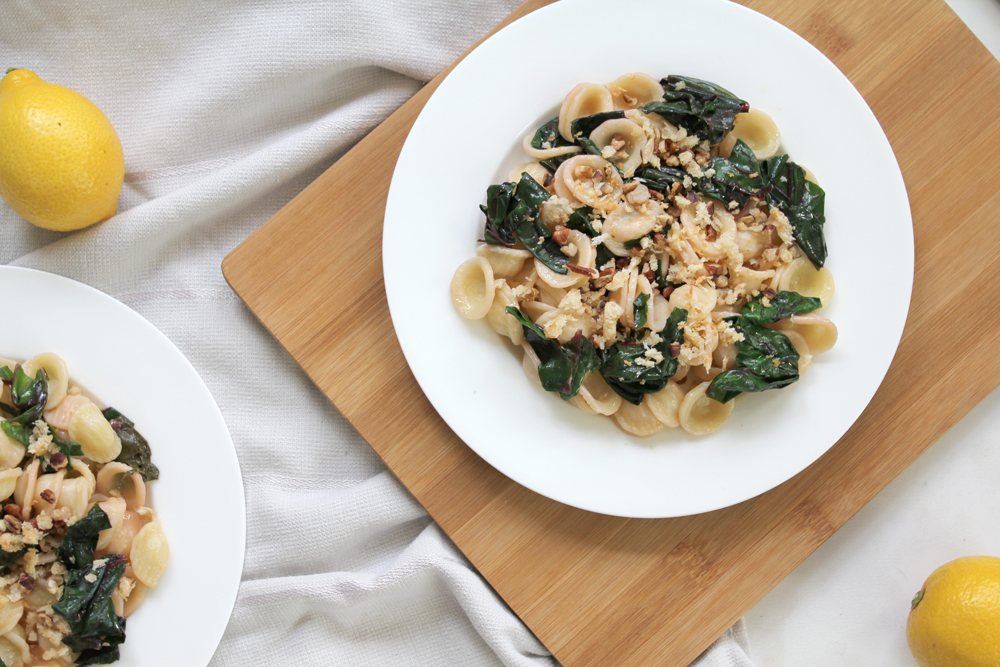
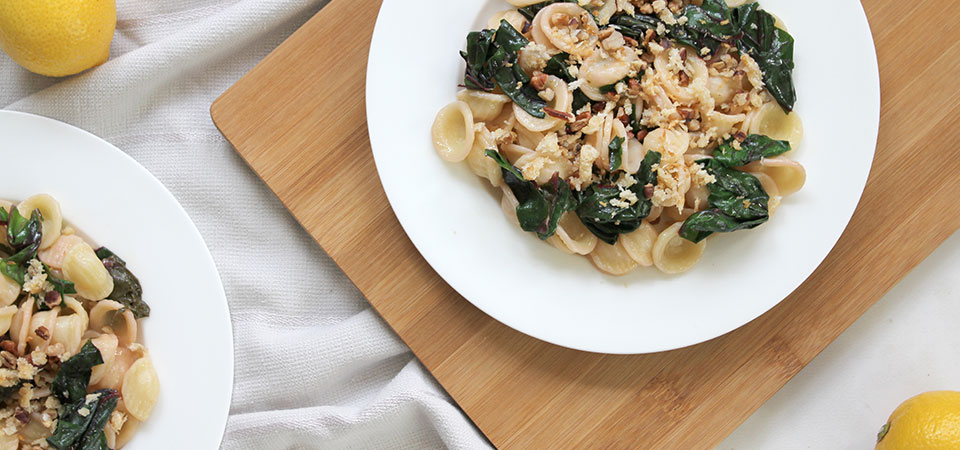
Happy Friday! It has been awhile since I have posted a recipe and I think it is overdue. It has felt like Spring in Austin for a while already. The temperature been in the mid 70s to mid 80s for close to a month, which is crazy! Because it has been so warm, I have already moved from wintery foods to fresh, Spring meals. I do realize that it is still winter for some though, so this dish is a good compromise. Fresh and lemony, but still a nice comforting meal for those of you that are still dealing with the cold.

Lemony Orecchiette with Chard & Parmesan, Pecan Crumble
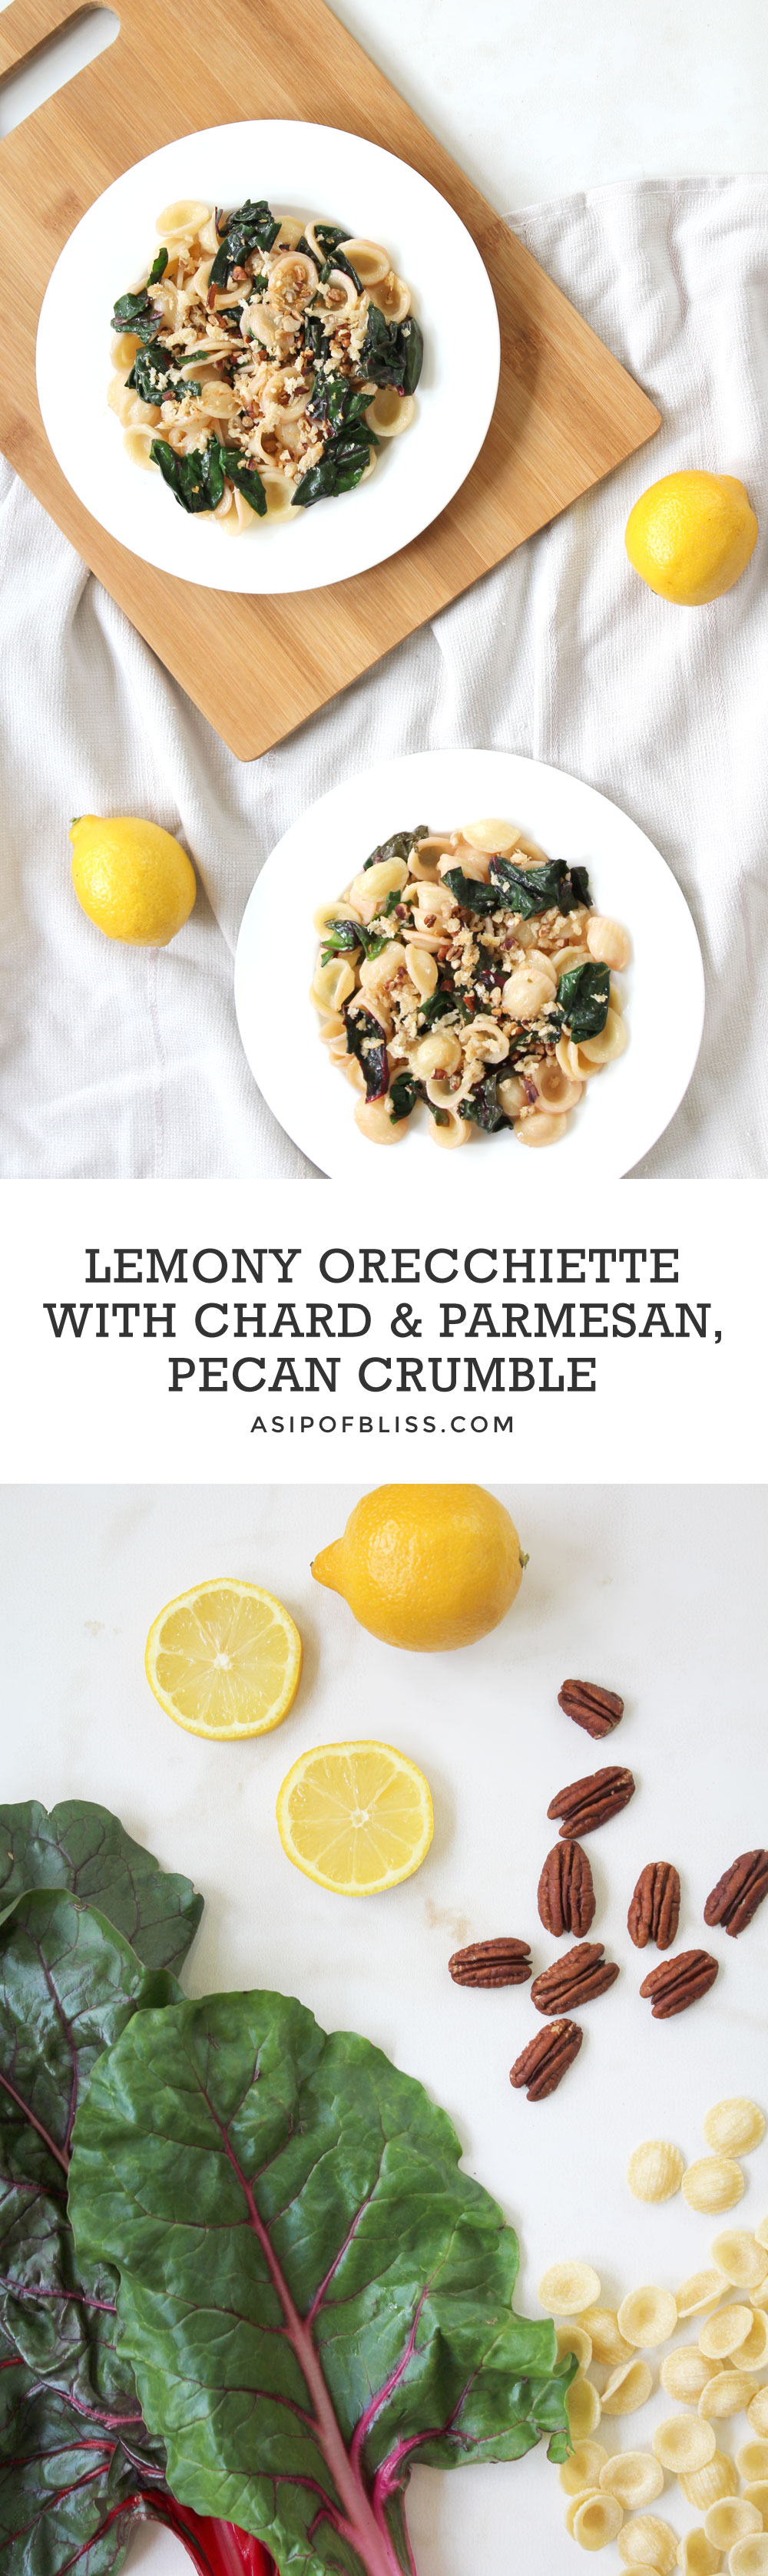
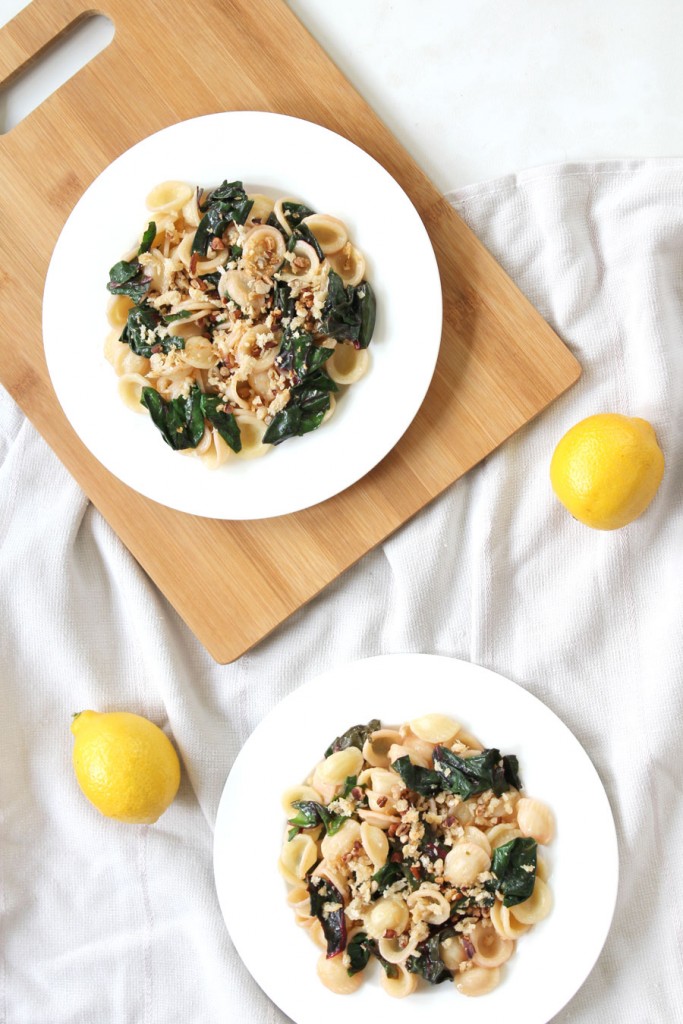
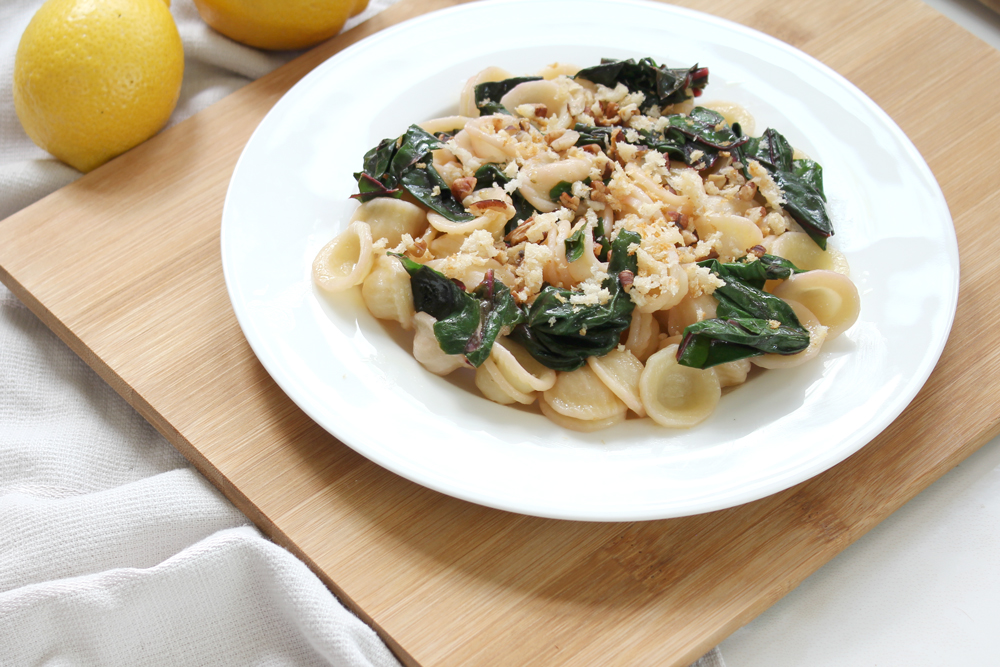
I got some beautiful chard in my CSA box and it was wonderful in this pasta, but spinach or kale would probably be equally as delicious! We had this as a main course, but it would be great as a side dish as well.

Lemony Orecchiette with Chard & Parmesan, Pecan Crumble

Ingredients

Serves 2-3 as a main dish

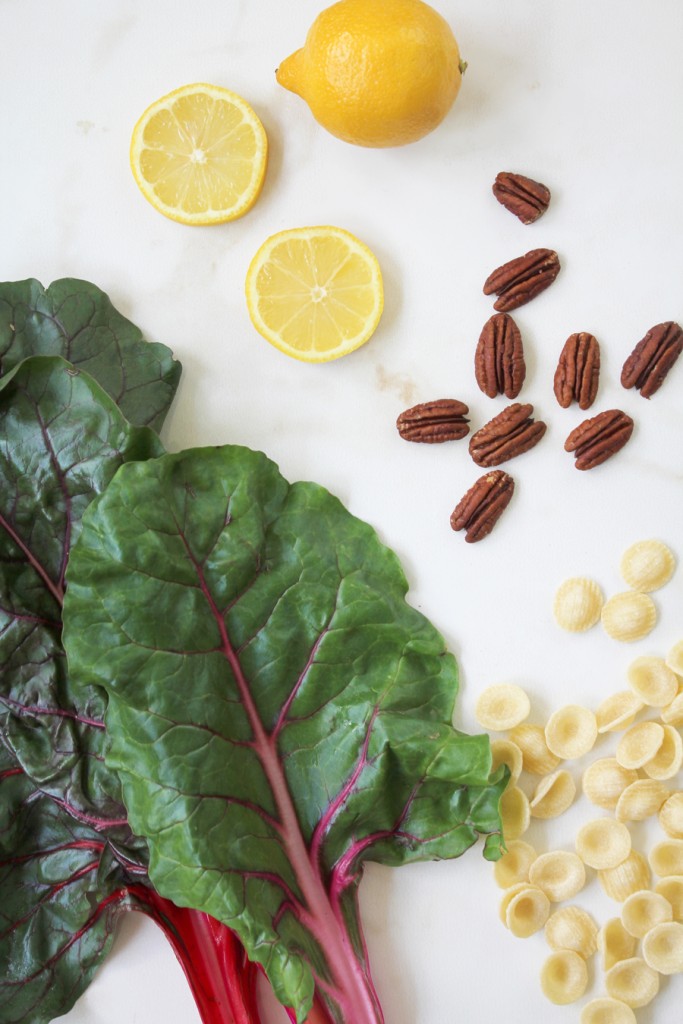
    • 2 cups Orecchiette Pasta (uncooked)
    • 4 cups Roughly Chopped Chard
    • 1/4 cup Lemon Juice
    • 1 tsp Lemon Zest
    • 3 tbsp Olive Oil
    • 3 Garlic Cloves, Halved Vertically
    • 1/4 cup Pasta Water (reserved from cooking orecchiette)
      Parmesan, Pecan Crumble:

    • 1/4 cup Panko Bread Crumbs
    • 1/4 cup Chopped Pecans
    • 1/4 cup Grated Parmesan Cheese
    • 1/4 tsp Kosher Salt
Directions
  1. Bring a large pot of salted water to a boil.
  2. Make parmesan, pecan crumble (see below) and set aside
  3. Once boiling, cook pasta until it is al dente (9-11 minutes). Reserve 1/4 cup of the pasta water before straining.
  4. While pasta is cooking, bring the olive oil and garlic to medium heat in a large skillet and cook (stirring constantly) until garlic starts to brown, about 5 minutes. Once garlic is slightly brown, remove it and discard (you are just using it to flavor the oil).
  5. Add lemon juice and zest to the olive oil.
  6. Add the chopped chard into the skillet and stir until just wilted.
  7. Add strained pasta and the 1/4 c pasta water to the skillet and stir to combine.
  8. Top with the crumble and serve.
    Parmesan, Pecan Crumble:

  1. Mix together all of the crumble ingredients
  2. Heat in a (dry) skillet over medium heat, stirring constantly, until parmesan melts and the crumble turns a golden brown

Lemony Orecchiette with Chard & Parmesan, Pecan Crumble

Lemony Orecchiette with Chard & Parmesan, Pecan Crumble

Pinch Proof Shamrock Pin

BY Jen

Pinch Proof Shamrock Pin

St. Patrick’s Day is almost here, and if you are like me and have a lack of green clothing, these pins will help avoid the dreaded pinches! You can make them just for yourself, or, I have also included a printable pdf to make them into fun little gifts for your friends (you choose if they get a pinch before you give them their pin :) ) Here is what you will need:

Pinch Proof Shamrock Pin

Supplies

Pinch Proof Shamrock Pin
Step 1:
Roll your polymer clay out in a sheet that is about 1/8″ thick and cut out as many hearts as you want (you will need 4 per pin)

Step 2:
Follow the directions on your polymer clay’s package to bake the hearts. Allow to cool completely.

Step 3: Using small dots of super glue, glue together the hearts to form a shamrock shape. (They will get more fully secured once the pin is glued on)

Pinch Proof Shamrock Pin

Step 4: Hot glue the bar pin to the back of the shamrock.

Step 5: Paint them with the glitter paint to add some sparkle!

Step 6: If you would like to make them into gifts, print out the backing card pdf and attach the pins to the cards.

Pinch Proof Shamrock Pin

Pinch Proof Shamrock Pin | A Sip of Bliss

DIY Leave-In Conditioner

BY Jen

DIY Leave-In Conditioner | A Sip of Bliss
Happy Leap Day! Is anyone doing anything exciting with their bonus day? I was out of town visiting family in sunny San Diego all last week, so I am playing catch up today. I am pretty busy with work, but the blog hasn’t had any love in awhile so I am stopping in to share a really quick and easy DIY for leave-in conditioner.

I used to have a HUGE collection of beauty products taking over my bathroom, but ever since I started simplifying my beauty routine and using more natural products I have been so much happier! My bathroom stays organized and I save so much money! I have super thick hair so a leave-in conditioner is a must for me. This version uses your regular old conditioner, almond oil and water. The mixture gets lightly sprayed onto your hair to detangle it and make it shiny and manageable (without making it greasy). And these are ingredients I always have on hand so it is super easy to whip up a batch whenever I run out. I hope you enjoy it!

Directions
  1. Combine all ingredients in your fine mist spray bottle.
  2. Shake before using, as it will separate between uses.
  3. Lightly mist onto damp hair and comb through.

DIY Leave-In Conditioner | A Sip of Bliss

1 5 6 7 8 9 12