DIY

DIY Reed Diffuser

BY Jen

DIY Reed Diffuser | A Sip of Bliss

I have wasted a lot of money on scented items in my life. I used to love having candles and air fresheners all over my house. I would have stashes of them that never even got used, but for some reason I kept buying them.

I still love having a fresh smelling house but I now try to avoid using synthetic fragrances. I also like more natural scents now as opposed to the super strong or sickly sweet smells of my youth (cucumber melon from Bath and Body Works anyone?).

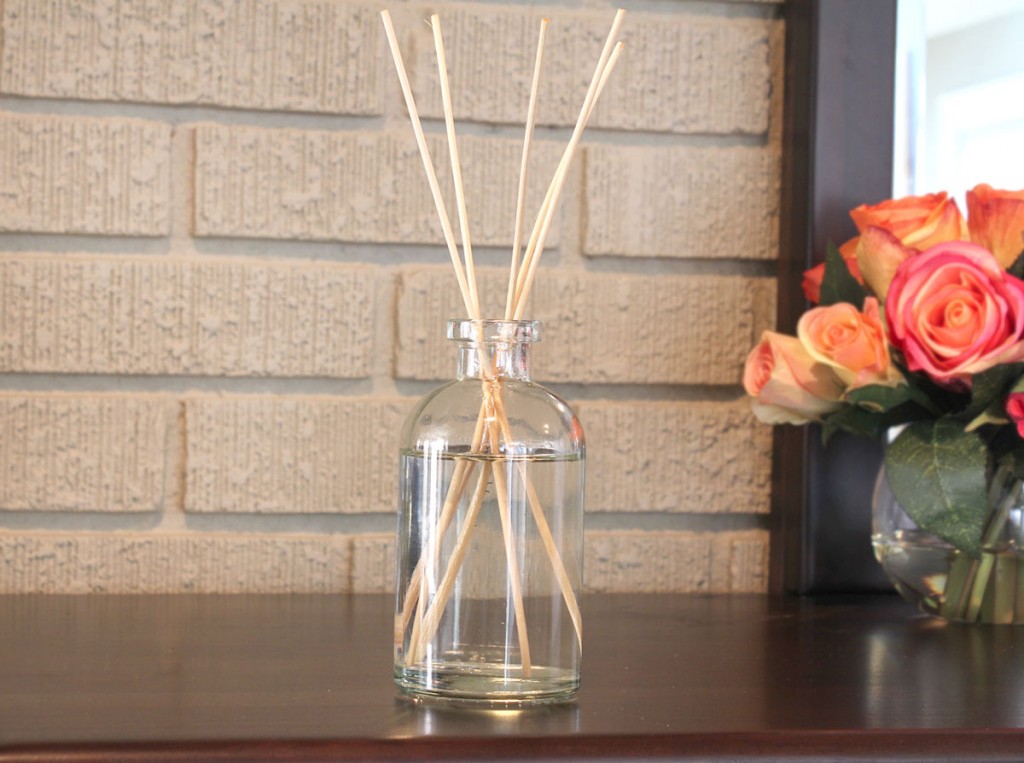
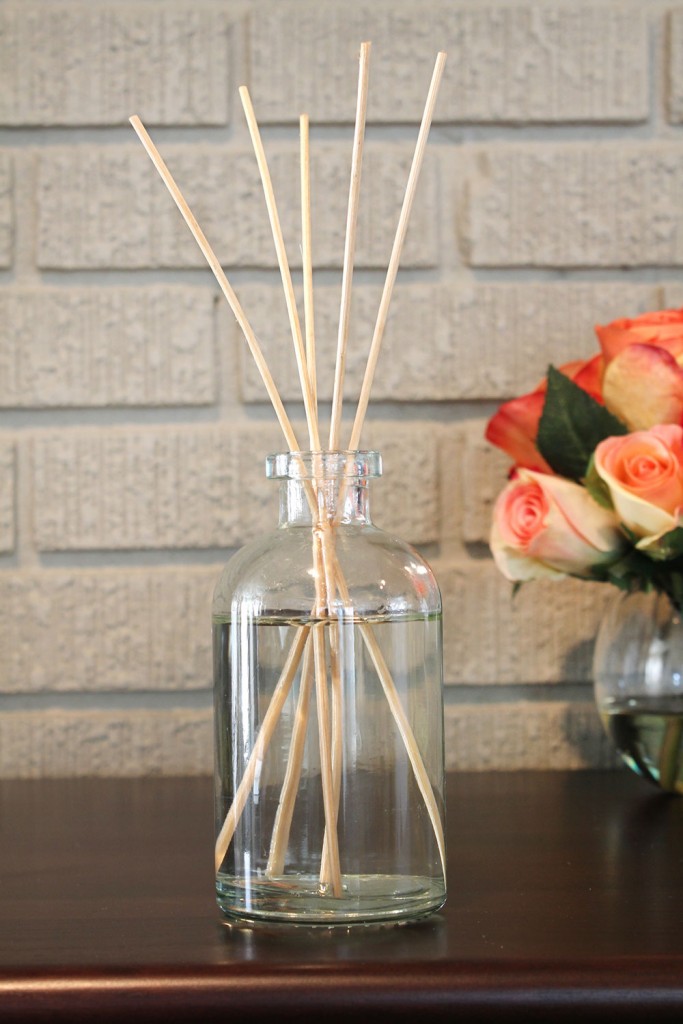
This reed diffuser is a super easy DIY project that will make your house smell lovely. And it costs a fraction of the amount of store bought air fresheners…bonus! All you need is a small glass bottle, water, diffuser reeds, essential oils and vodka (helps the oils and water to bind). I used lavender and vanilla oils for mine because it is in our bedroom and I wanted a calming scent, but you can use any scents you like.
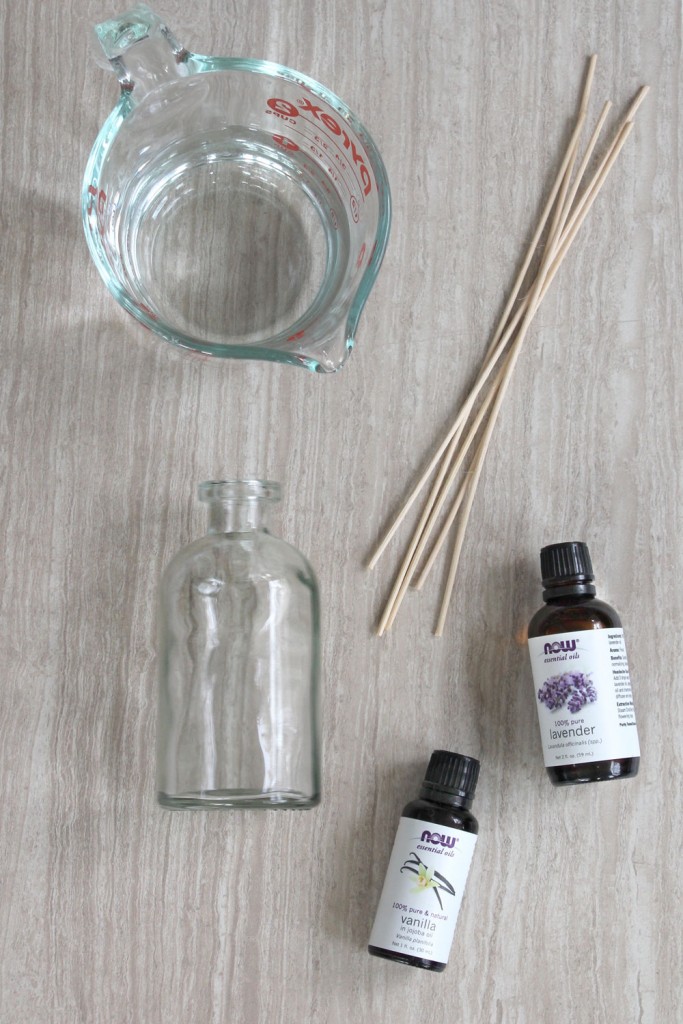
DIY Reed Diffuser | A Sip of Bliss

Supplies
  • Glass Bottle
  • Diffuser Reeds
  • 1/4 c Vodka
  • 3/4 c Water
  • 15-20 drops Essential oils
Directions
  1. Combine vodka, water and essential oils in the glass bottle.
  2. Add several diffuser reeds (I used 5).
  3. Turn reeds over every several days to keep the scent fresh. Add more essential oils as needed.

DIY Reed Diffuser | A Sip of Bliss

Lavender Infused Honey

BY Jen

Lavender Infused Honey | A Sip of Bliss

I love honey and I love lavender, so this combo is a match made in heaven. The lavender adds a subtle, yet delicious floral flavor to the honey and you can use it in so many things. It is great in anything you would use regular honey: tea, yogurt, desserts, cocktails, the possibilities are endless. And do yourself a favor, try it on vanilla ice cream. Seriously, just take my word on this one. It’s awesome.

Lavender Infused Honey | A Sip of Bliss

And it couldn’t be any easier…stir, wait, strain, eat…that’s it. The measurements aren’t a science here either so if you want a stronger or more subtle lavender flavor, feel free to adjust.

Directions
  1. Add honey and lavender in a glass jar. Stir to combine and cover.
  2. Let sit for at least a week, stirring every day or two (lavender will float to the top)
  3. Strain with a fine mesh strainer.

Lavender Infused Honey | A Sip of Bliss

Glam Gold & White Pumpkins

BY Jen

Glam Gold & White Pumpkins

I can’t believe Halloween is in 5 days! I have been seriously slacking on Halloween prep and projects this year. I couldn’t go without doing something crafty though, so I made these gold and white pumpkins. You can use real or faux pumpkins for this project. I used fake ones that were on sale for 60% off at Michael’s and spray painted them off-white. These are a super easy (and classy) way to decorate pumpkins.


Color blocked gold pumpkin

You will need:

  • Liquid gold leaf (you could also use gold spray paint)
  • Painter’s tape
  • Paint brush (a cheap one you will throw away).

Directions: Mask off half of the pumpkin using painter’s tape. Paint bottom half with the liquid leaf and repeat with a second coat. Allow to dry and remove the tape.

Glam Gold & White Pumpkins

Glam Gold & White Pumpkins


Glitter ombre pumpkin

You will need:

  • Spray adhesive
  • Painter’s tape
  • Gold glitter

Directions: Mask off the pumpkin’s stem (if you don’t want glitter on it). Spray the top of the pumpkin with spray adhesive and sprinkle with glitter while the adhesive is still wet.

Note: You can use a spoon for the glitter if you don’t want to end up with glitter hands like I did

Glam Gold & White Pumpkins

Glam Gold & White Pumpkins


Mini Polka Dot Pumpkin

You will need:

  • Gold pins

Directions: Stick pins all over the pumpkin to make tiny gold polka dots!

Note: this worked perfectly with the faux pumpkin I used, it may be more difficult with a real one depending on how tough the skin is.

Glam Gold & White Pumpkins


And there you have it… super easy ways to glam up your Halloween!

Glam Gold & White Pumpkins

Glam Gold & White Pumpkins

1 2 3 4 5